Once an alteration is created, the next step is to send it to the tailor shop that will do the work, and (optionally) to the specific tailor in charge of it. This is also where you select which pieces of the garment need to be altered.
An alteration always has one of three statuses, shown as a badge in the list:
- Unassigned — no tailor shop has been assigned yet.
- In tailor shop — a tailor shop has been assigned and the work is in progress.
- Completed — the alteration is done.
Assigning the tailor shop
You can assign the tailor shop in two ways:
- Directly when you create the alteration, using the Tailor Shop drop-down on the New Alteration form, or
- Afterwards, from the Edit screen.
To do it afterwards, go to the Alterations page, find the item in the list and click on Edit. From the Tailor Shop drop-down, select the shop that will handle the work (see picture below).
As soon as a tailor shop is assigned, the alteration status changes from Unassigned to In tailor shop.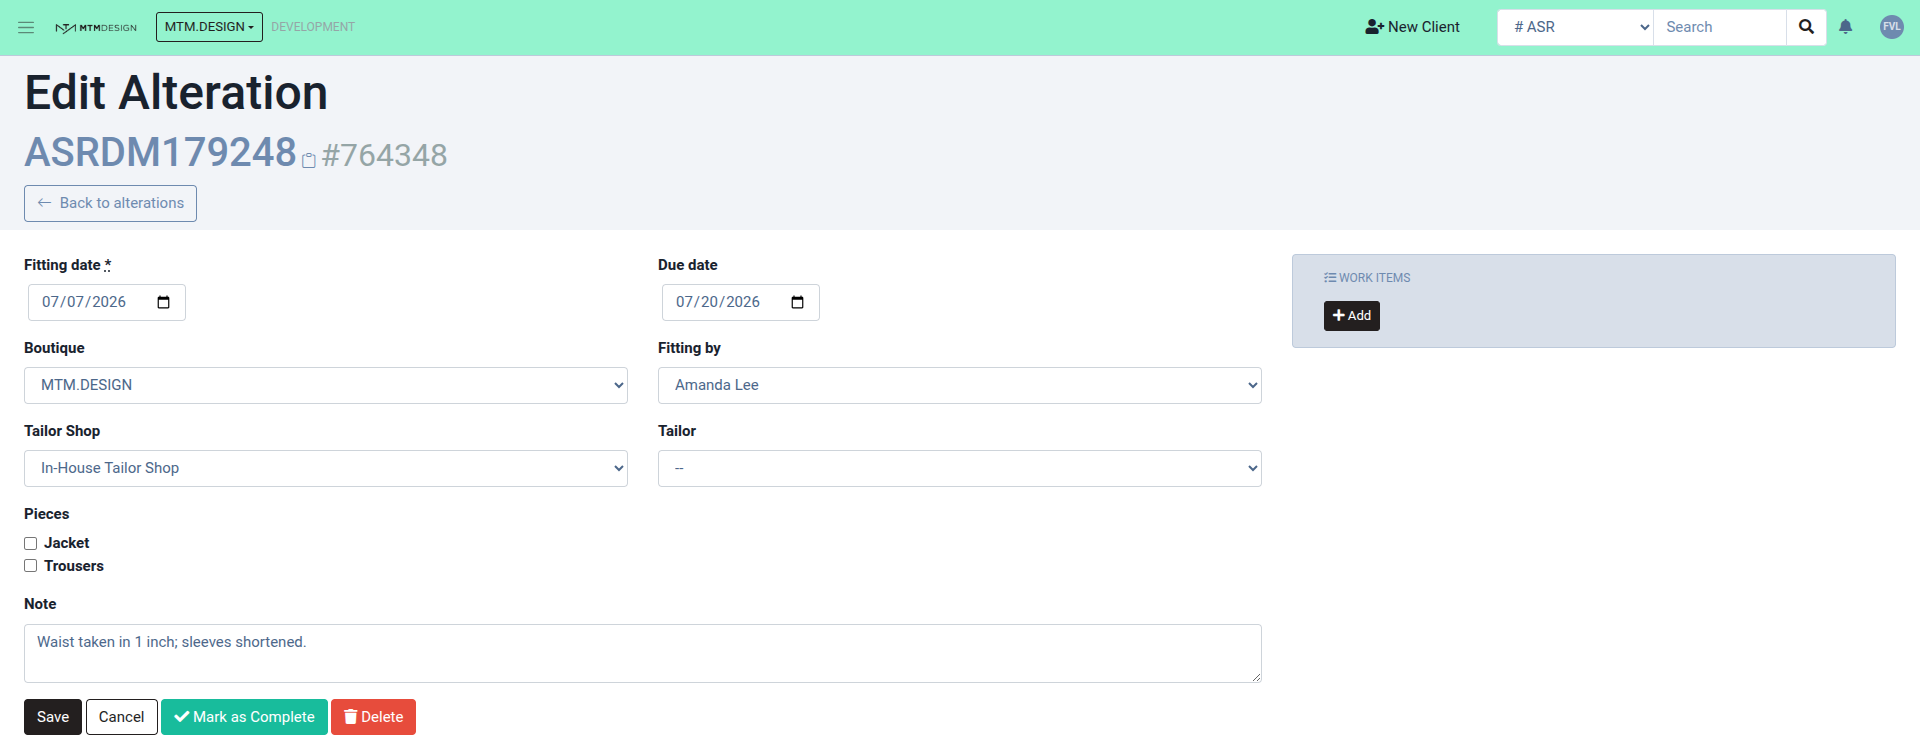
Assigning the tailor
The Tailor drop-down only appears once a tailor shop has been assigned (see picture above). Select the tailor responsible for the alteration from the list — only the tailors that belong to the selected tailor shop are shown.
Selecting the pieces
If the item is made of several pieces (for example a suit with a Jacket and Trousers), you can check the specific Pieces that need to be altered (see picture above). This helps everyone know exactly what is being worked on.
When everything is set, click on Save.
*** Please note: A tailor can only be assigned once the alteration already has a tailor shop, and the tailor must belong to that same shop. If you change the tailor shop, make sure the assigned tailor still matches the new shop.
Was this article helpful?
That’s Great!
Thank you for your feedback
Sorry! We couldn't be helpful
Thank you for your feedback
Feedback sent
We appreciate your effort and will try to fix the article