Most alterations are attached to a product the client ordered and received in store (see How to create an alteration?). But sometimes you need to log an alteration that is not tied to an existing order — for example, altering a garment the client already owns, or any standalone tailoring job. In that case, you attach the alteration to a service item instead of a product.
This takes three steps: create a service, add that service to the client, then create the alteration on it.
Step 1 is a one-time setup. You only need to create the service once for your brand. Once it exists, every future standalone alteration starts at Step 2 — you simply reuse the same service.
Step 1 — Create a tailoring service (one time only)
This is a one-time setup. If you have already created a tailoring service, skip ahead to Step 2.
Services are managed from the Service Management page. From the top-left menu, go under Services.
A service must live in a sub-category — you need two levels of categories. In the Categories list on the left, you need:
- a top-level category (for example Services), and
- a sub-category under it (for example Tailoring).
A service can only be attached to a sub-category, and only sub-categories appear on the item-selection page in Step 2. If you don't have this structure yet, use + New Category to create the top-level category first, then create the sub-category under it.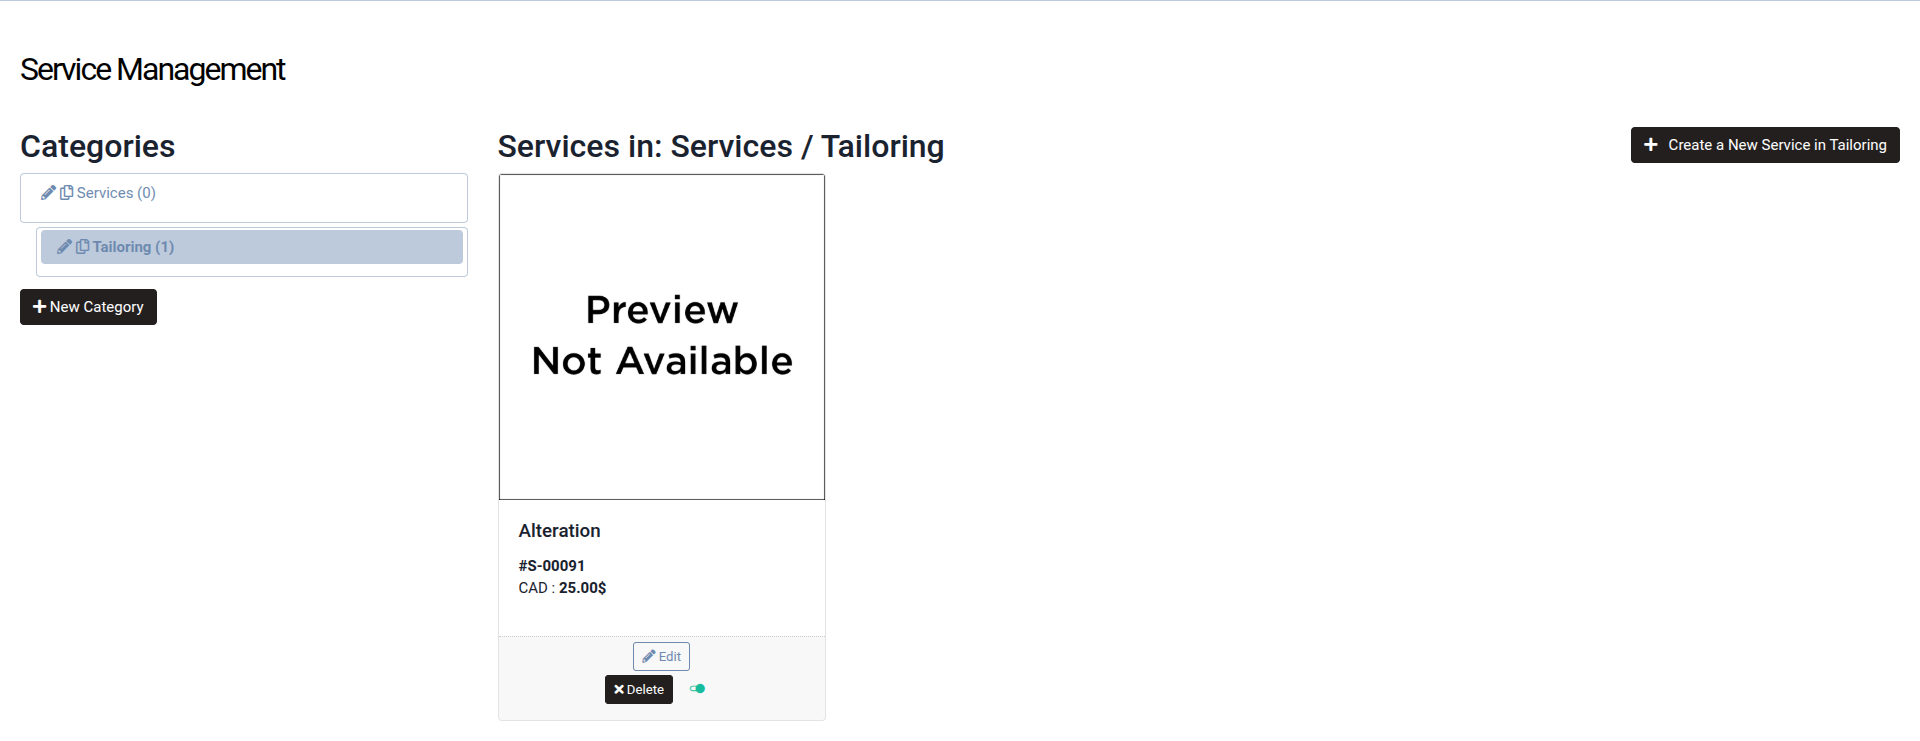
Then, with the sub-category selected, click + Create a New Service in [Category] and fill in the form:
- Name (EN) and Name (FR)
- Service category — the sub-category (e.g. Tailoring)
- Display on web — leave this off for an in-store-only service
- Description (EN) / Description (FR) — optional
- Prices — the price of the service for each currency
- Main picture — optional
Click Save.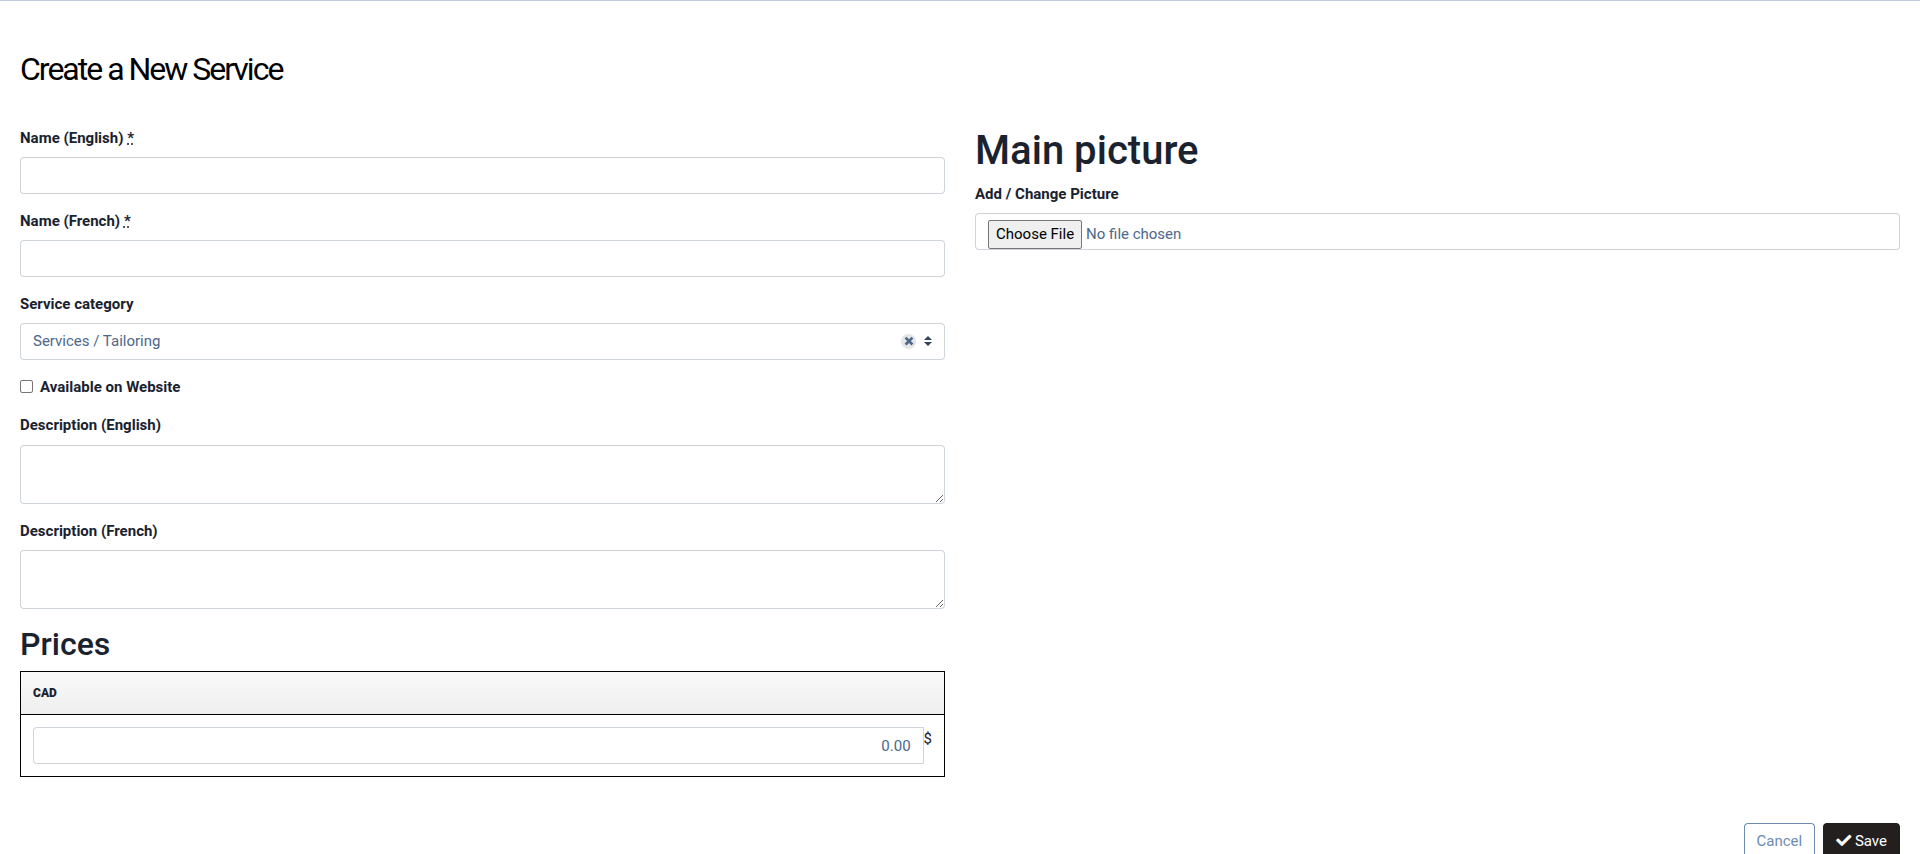
Step 2 — Add the service to the client
Now add the service to the client, the same way you would add a garment. On the item-selection page, the left menu lists your categories: under the Services heading, click the sub-category (e.g. Tailoring) to see your service.
Click Add to cart on the service (e.g. Alteration) to add it to the client's order (see picture below).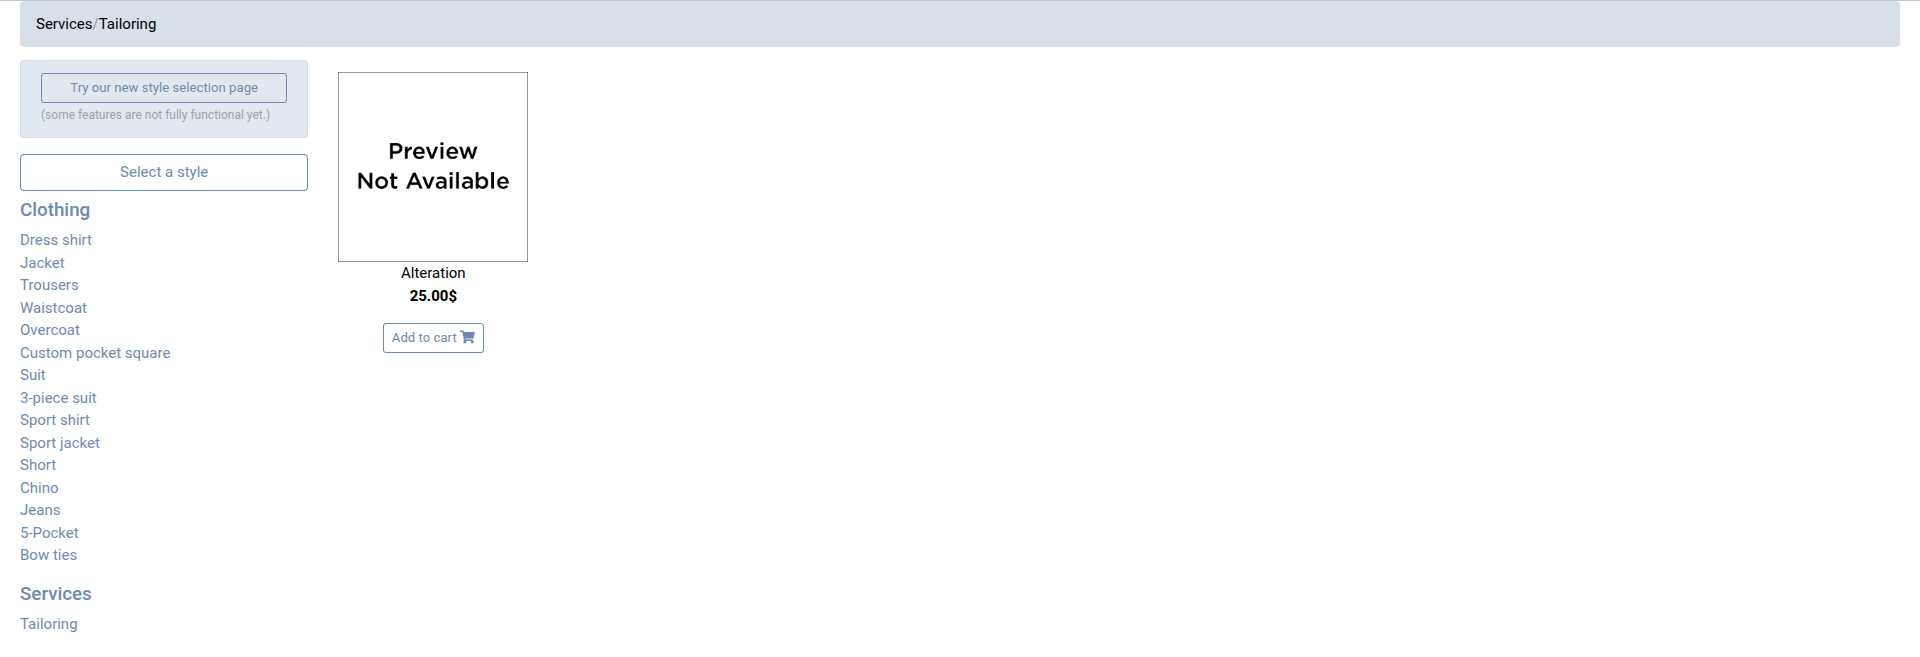
Step 3 — Create the alteration on the service item
Once the service is on the client's order, create the alteration on it just like any other. From the item, click its alteration button (the same ALT action described in How to create an alteration?). The New Alteration form opens with the service already selected — fill in the fitting date, due date, tailor shop and note, then click Save.
From there, everything works exactly like a product-based alteration: you can assign a tailor, log work, and track it (see How to assign an alteration to a tailor shop and tailor? and How to view and track alterations?).
*** Please note:
- A service can only be attached to a sub-category. The platform will not let you assign it to a top-level category, and a service that is not under a proper two-level structure will not appear on the item-selection page.
- Unlike product-based alterations, a service item does not need to have been "received" in store — you can create its alteration right away.
Was this article helpful?
That’s Great!
Thank you for your feedback
Sorry! We couldn't be helpful
Thank you for your feedback
Feedback sent
We appreciate your effort and will try to fix the article