When a client comes in for a fitting and one of their items needs to be adjusted, you can log an alteration in the platform to keep track of the work that needs to be done. An alteration is always attached to an item, which can be either:
- A product the client ordered — in this case the item must have already been received in store, or
- A service item — used for standalone alterations (a garment the client already owns, or any tailoring job not tied to an order). See How to create an alteration without an existing item?
There are two ways to start a new alteration — both open the same form.
Option 1 — From the item's page (quickest)
On the item's page, find the item row at the bottom and click the ALT button (see picture below). The New Alteration form opens with the item already filled in, so you can go straight to the details.
If the item already has an alteration, the ALT button opens that existing alteration for editing instead of creating a new one.
Option 2 — From the Alterations page
From the top-left menu, go under Alterations. On the Alterations page, click on the + New Alteration button (see picture below). On the form, you will enter the item's ASR code to link it.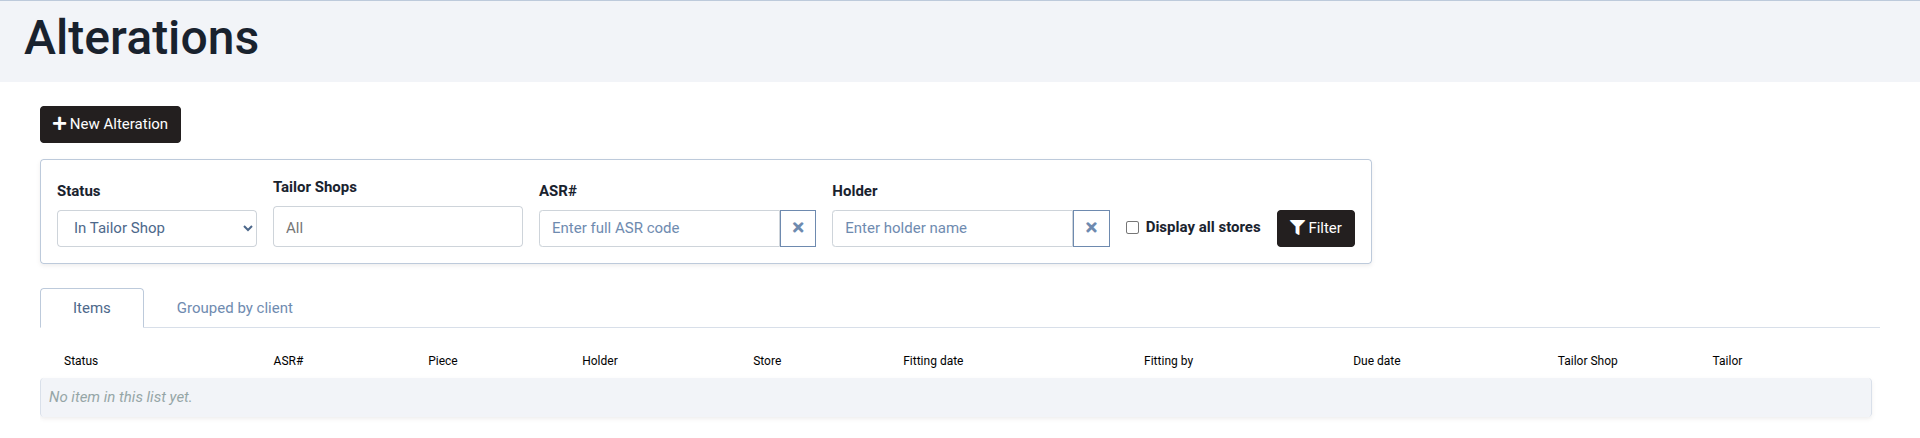
Filling in the form
Whichever way you opened it, fill in the following (see picture below):
- ASR code / item — if you started from the item's page (Option 1), the item is already set. Otherwise, enter the full ASR code of the item being altered.
- Fitting date — the date of the fitting. This field is mandatory and defaults to today's date.
- Due date — the date by which the alteration should be completed (optional, but strongly recommended so the item shows up correctly in your tracking — see How to view and track alterations?).
- Boutique — the store the alteration belongs to (defaults to your current store).
- Fitting by — the person who performed the fitting.
- Tailor Shop — the tailor shop that will handle the work. You can leave this blank for now and assign it later (see How to assign an alteration to a tailor shop and tailor?).
- Pieces — if the item is made of several pieces (for example a Jacket and Trousers on a suit), tick the ones being altered. (This appears only once the item is known — see the note below.)
- Note — any details about the adjustment to be made (what to take in, let out, shorten, etc.).
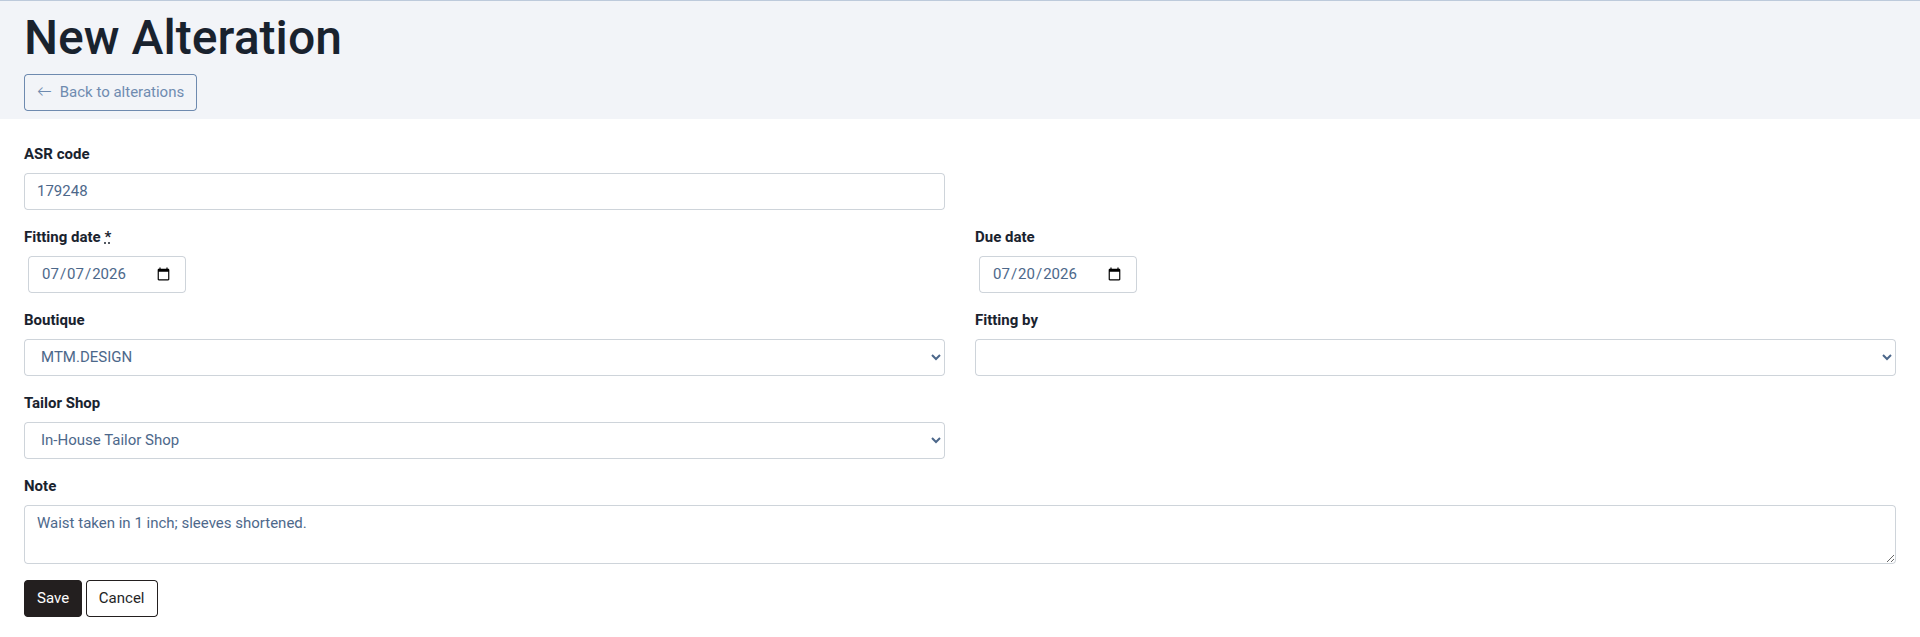
When everything is set, click on Save.
At this point, the alteration is created and you are taken back to the Alterations list, where a confirmation message appears and your new alteration is now shown (see picture below).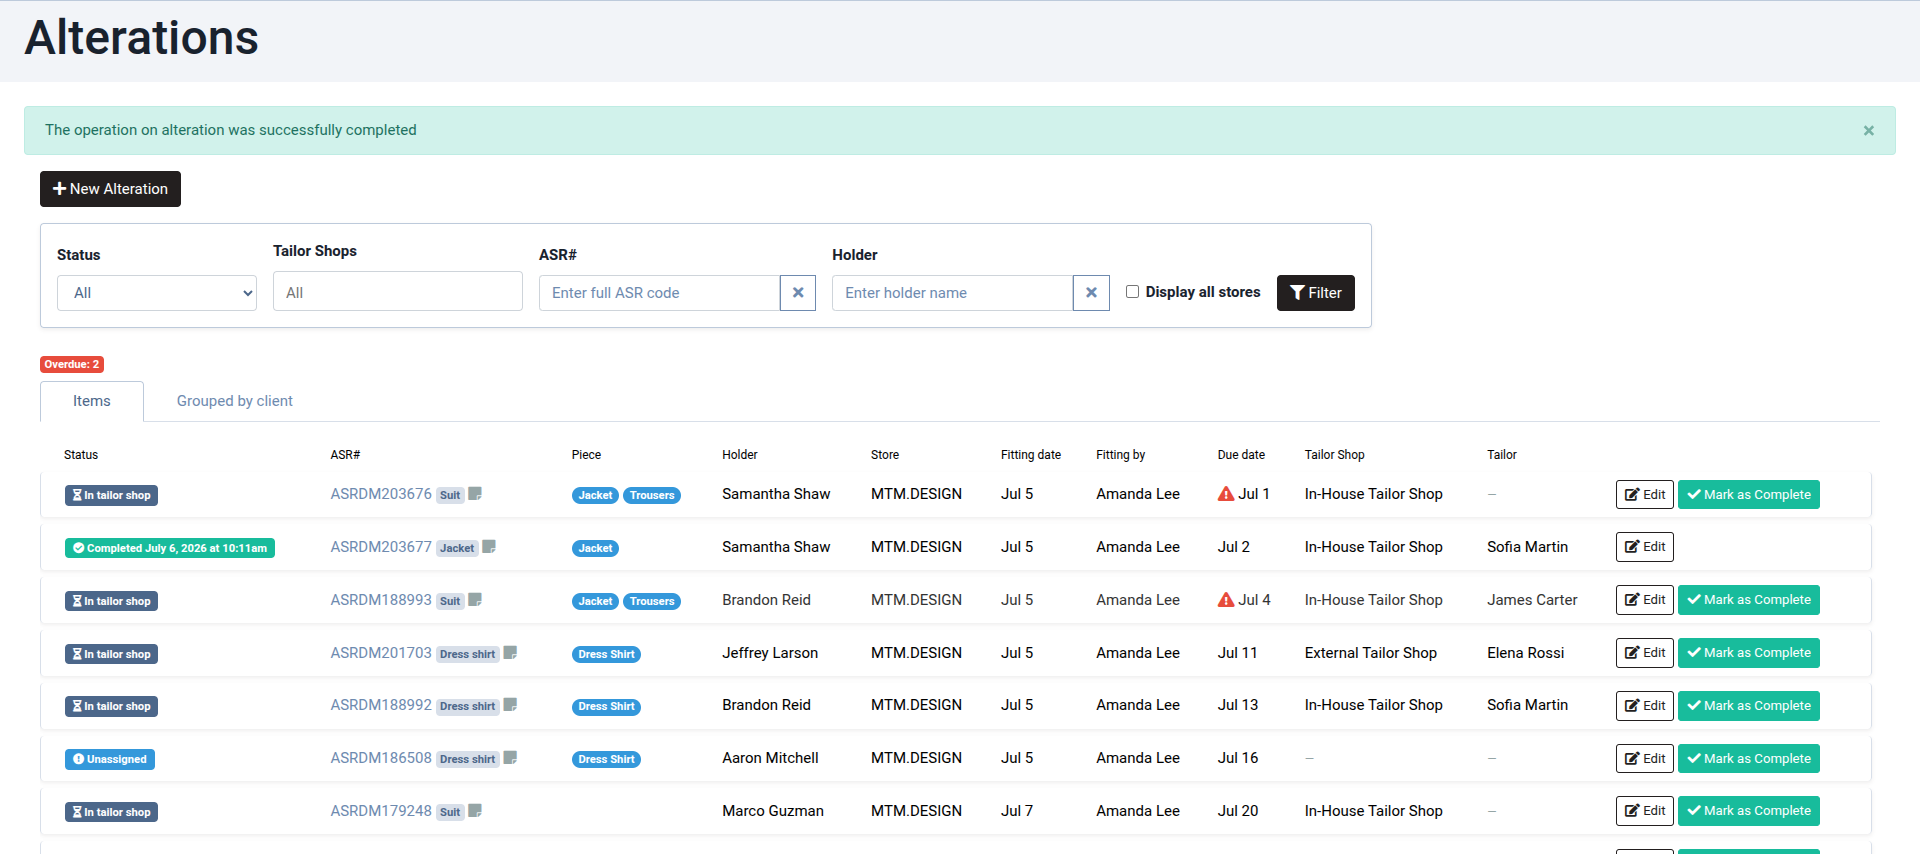
*** Please note:
- An item can only have one active alteration at a time. If an alteration already exists for that item and is not yet completed, you will not be able to create a second one.
- When you start from the + New Alteration button (Option 2) and link the item by ASR code, the Pieces selection is not shown right away. You can always add or change the pieces afterwards from the Edit screen — see How to assign an alteration to a tailor shop and tailor?
Was this article helpful?
That’s Great!
Thank you for your feedback
Sorry! We couldn't be helpful
Thank you for your feedback
Feedback sent
We appreciate your effort and will try to fix the article