Measurements belong to the client, not to one order. You take them once per garment type, and every item of that type you build for that client uses them. You can take them before or after you build the item.
Where to find them
Open the client and click Measurements in the left menu. The date next to it is the last time anything on the page changed.
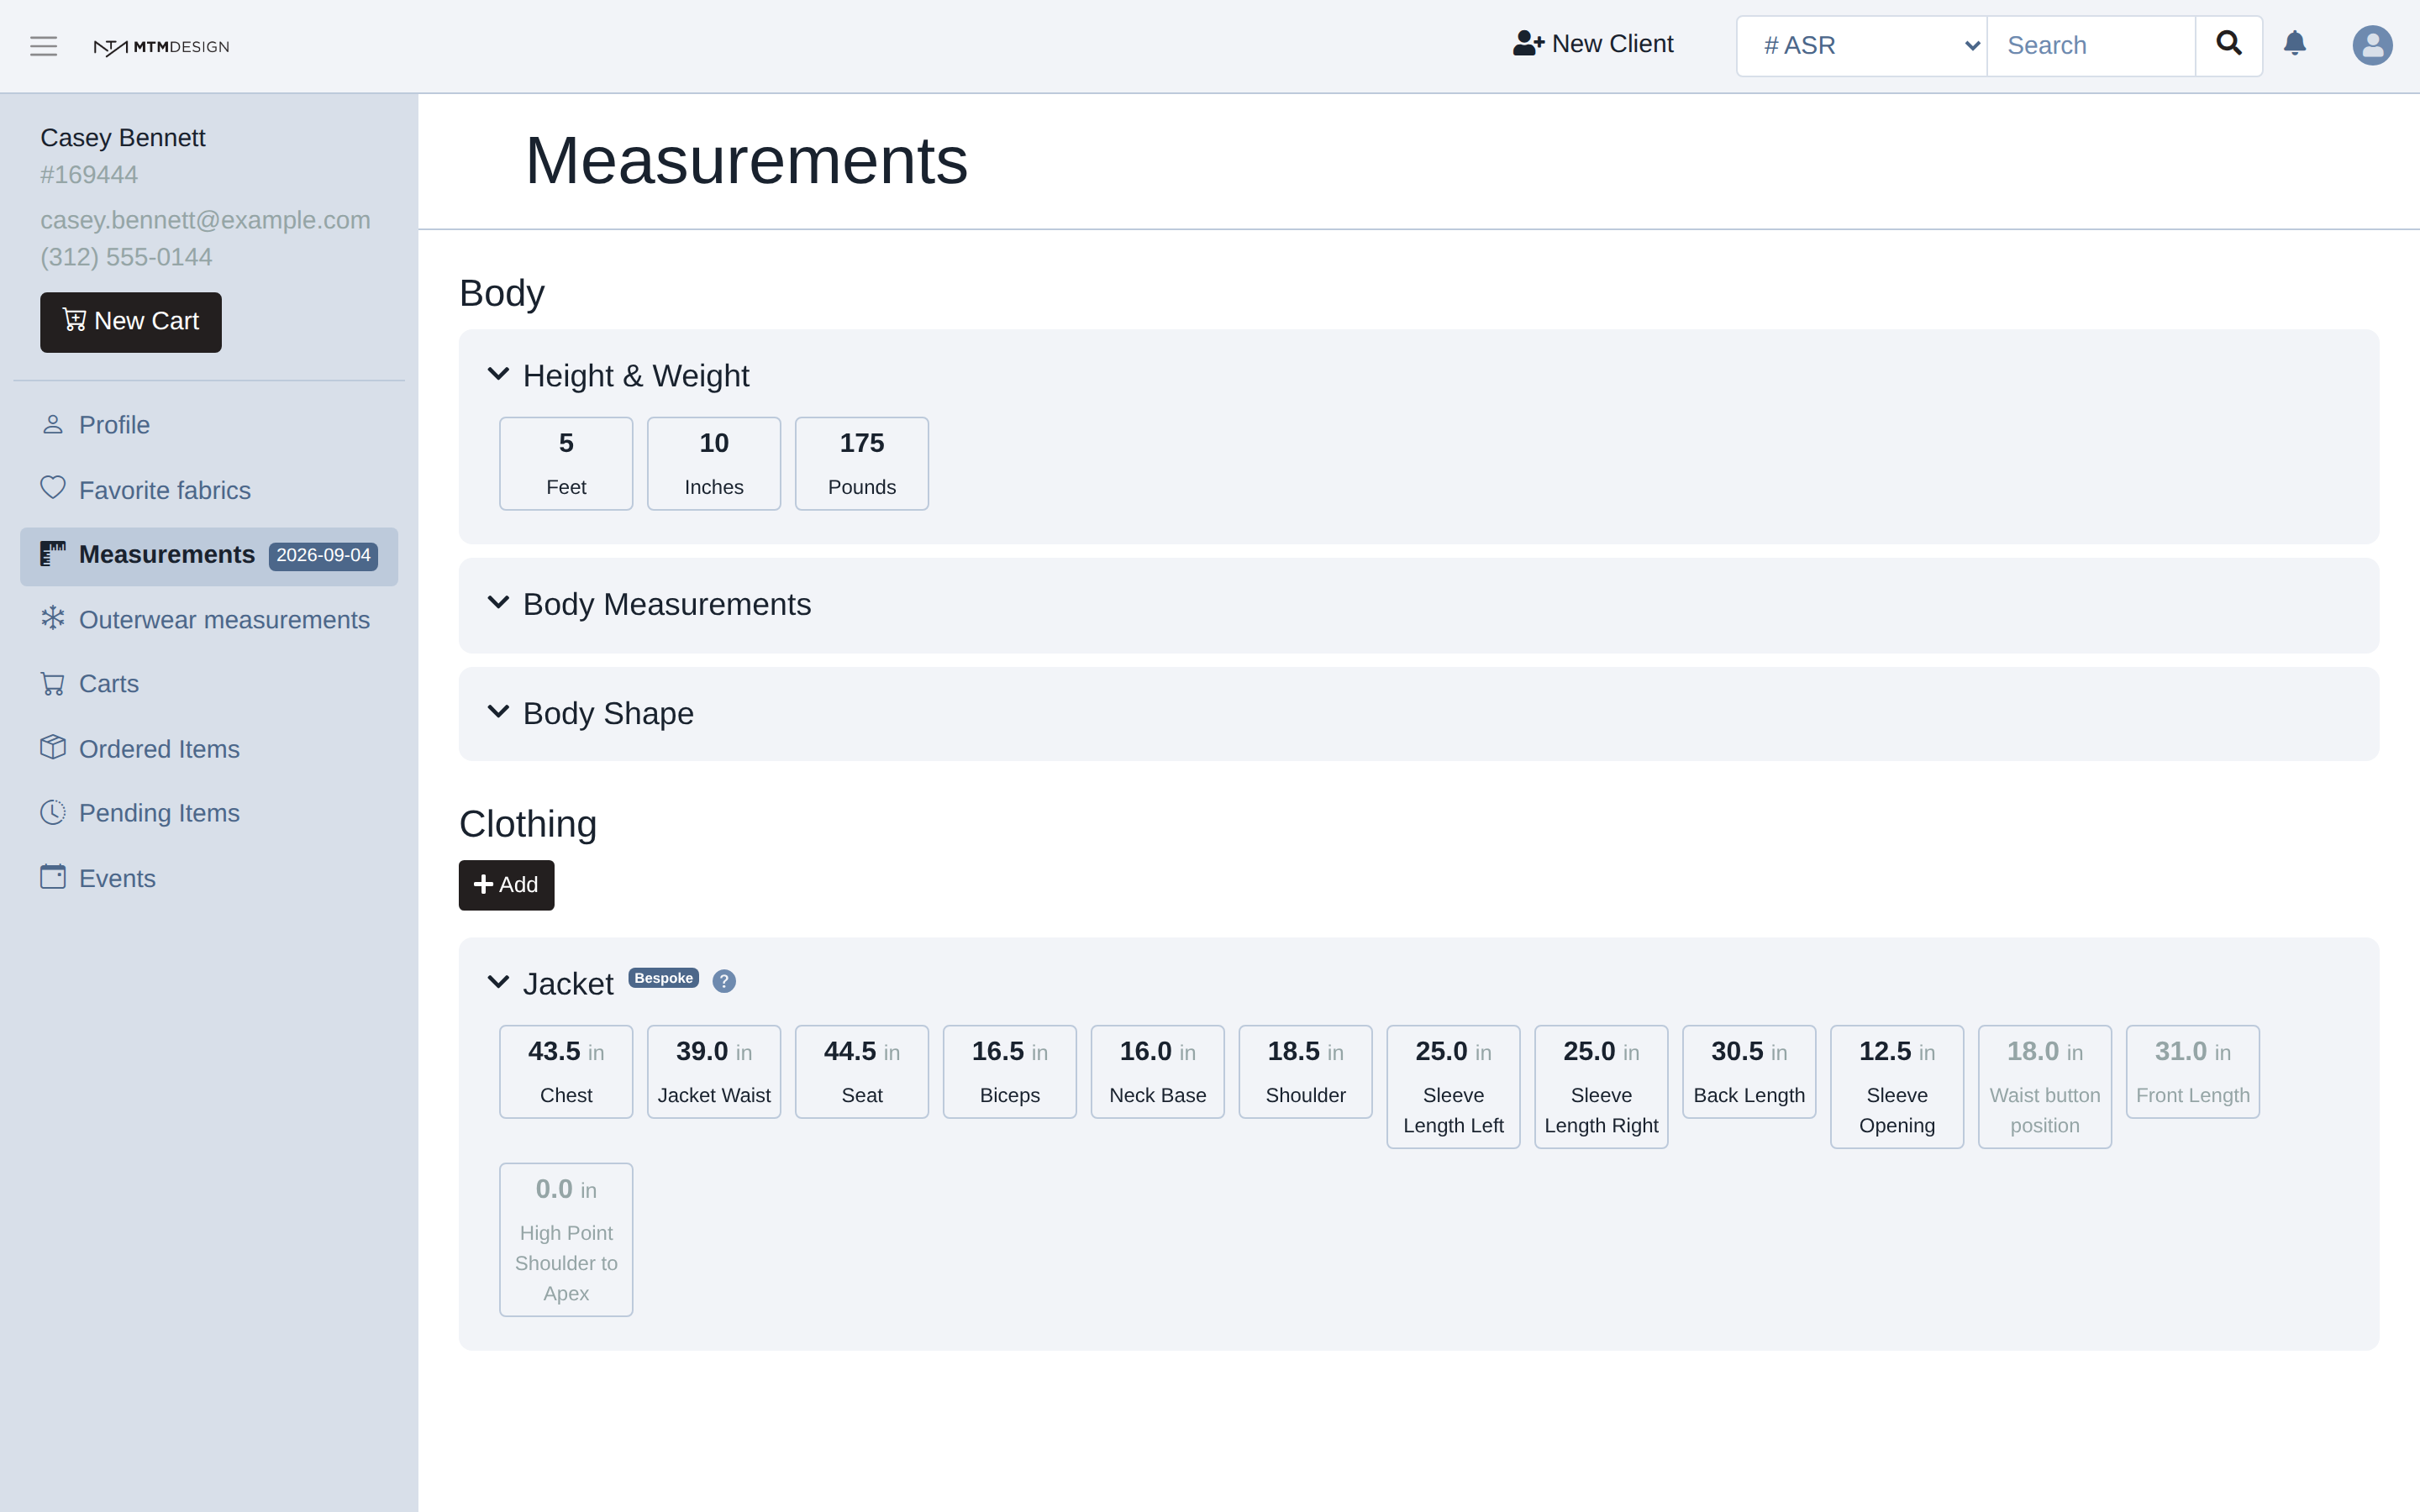
There is no Save button. Every field saves on its own as you type it, and a small spinner next to the section title shows while it saves.
Start with the body
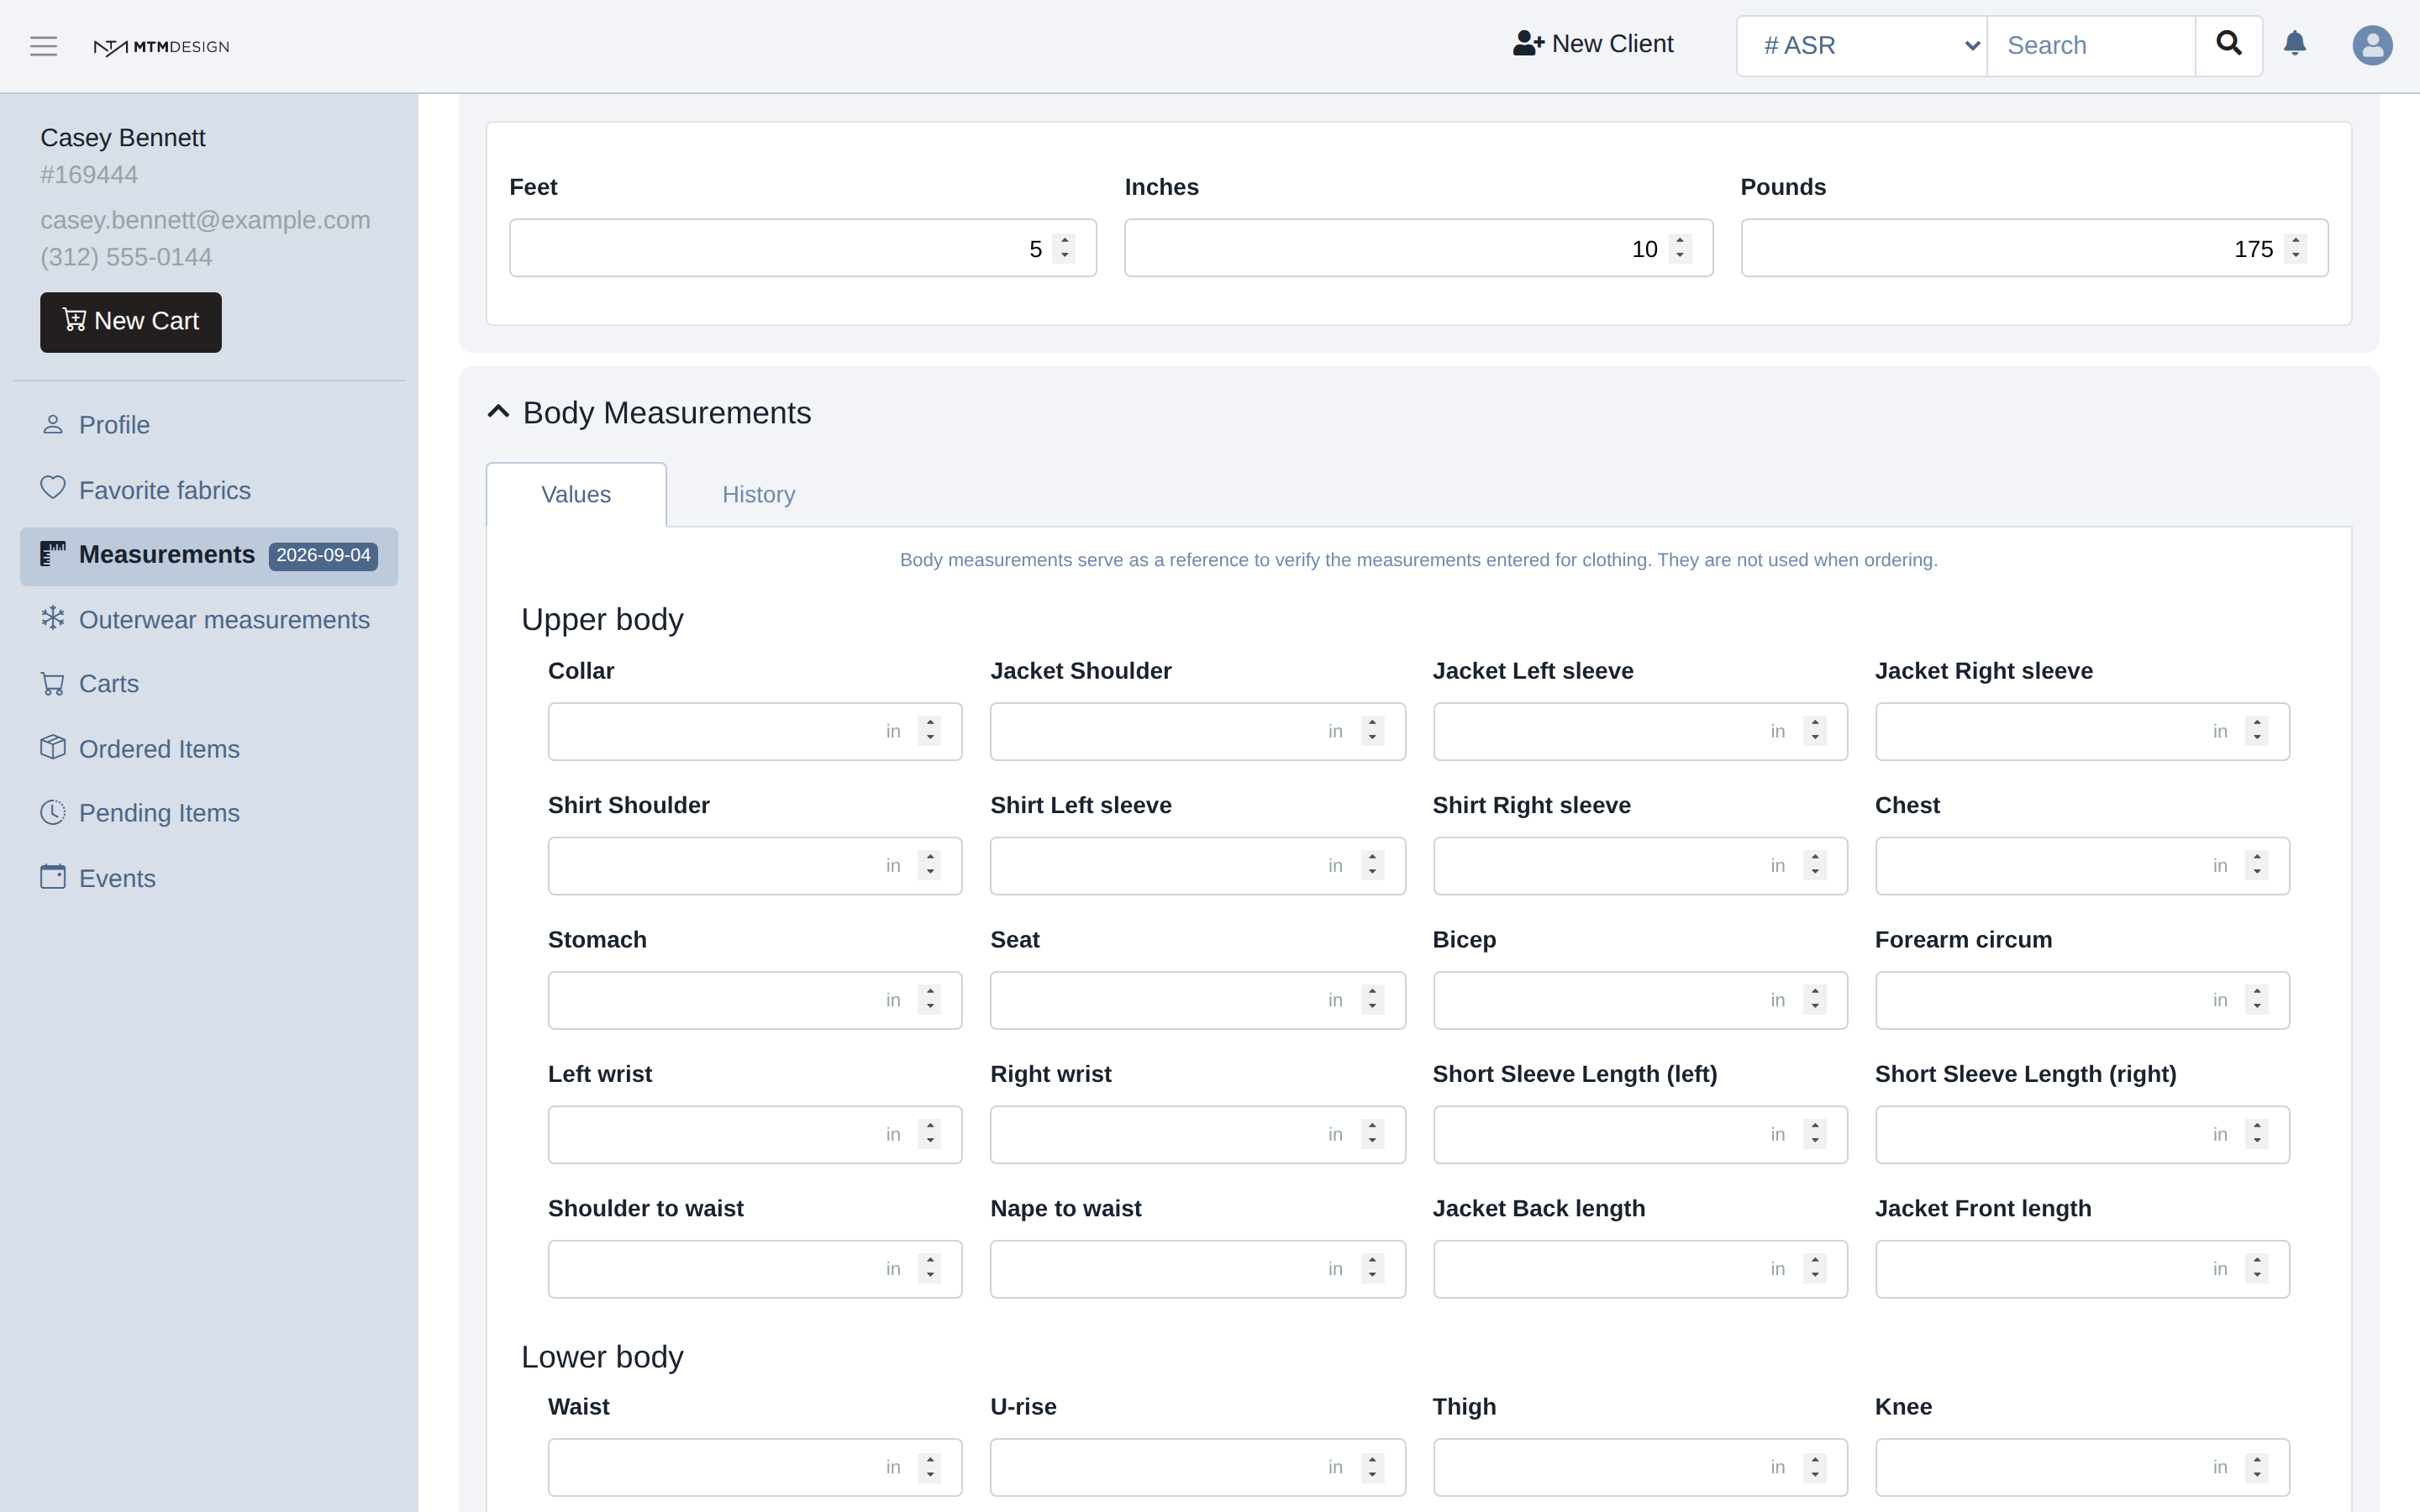
Height & Weight comes first. Every order needs it, whatever the garment.
Body Measurements is a reference. It is where you write down what you measured on the client's body, so you can check a garment against it later. Those numbers are not sent to the maker.
Body Shape is for a posture that needs it: a forward neck, a sloping shoulder, a prominent seat. It changes the shape of the pattern rather than a length. Most clients need none of it, and a body shape set by mistake is harder to spot than a wrong measurement, so if you are in doubt, leave it alone. Each setting has its own article under Body Shape / Posture, with pictures of what it does.
Add the garment
Under Clothing, click Add and choose the garment you are selling. Each garment keeps its own measurements, so the same client can have a jacket and a pair of trousers with different numbers, taken on different days.
Choose how you measure
Then pick a method. It decides what you type, not what the maker receives: whichever one you use, the maker is sent the finished measurements.
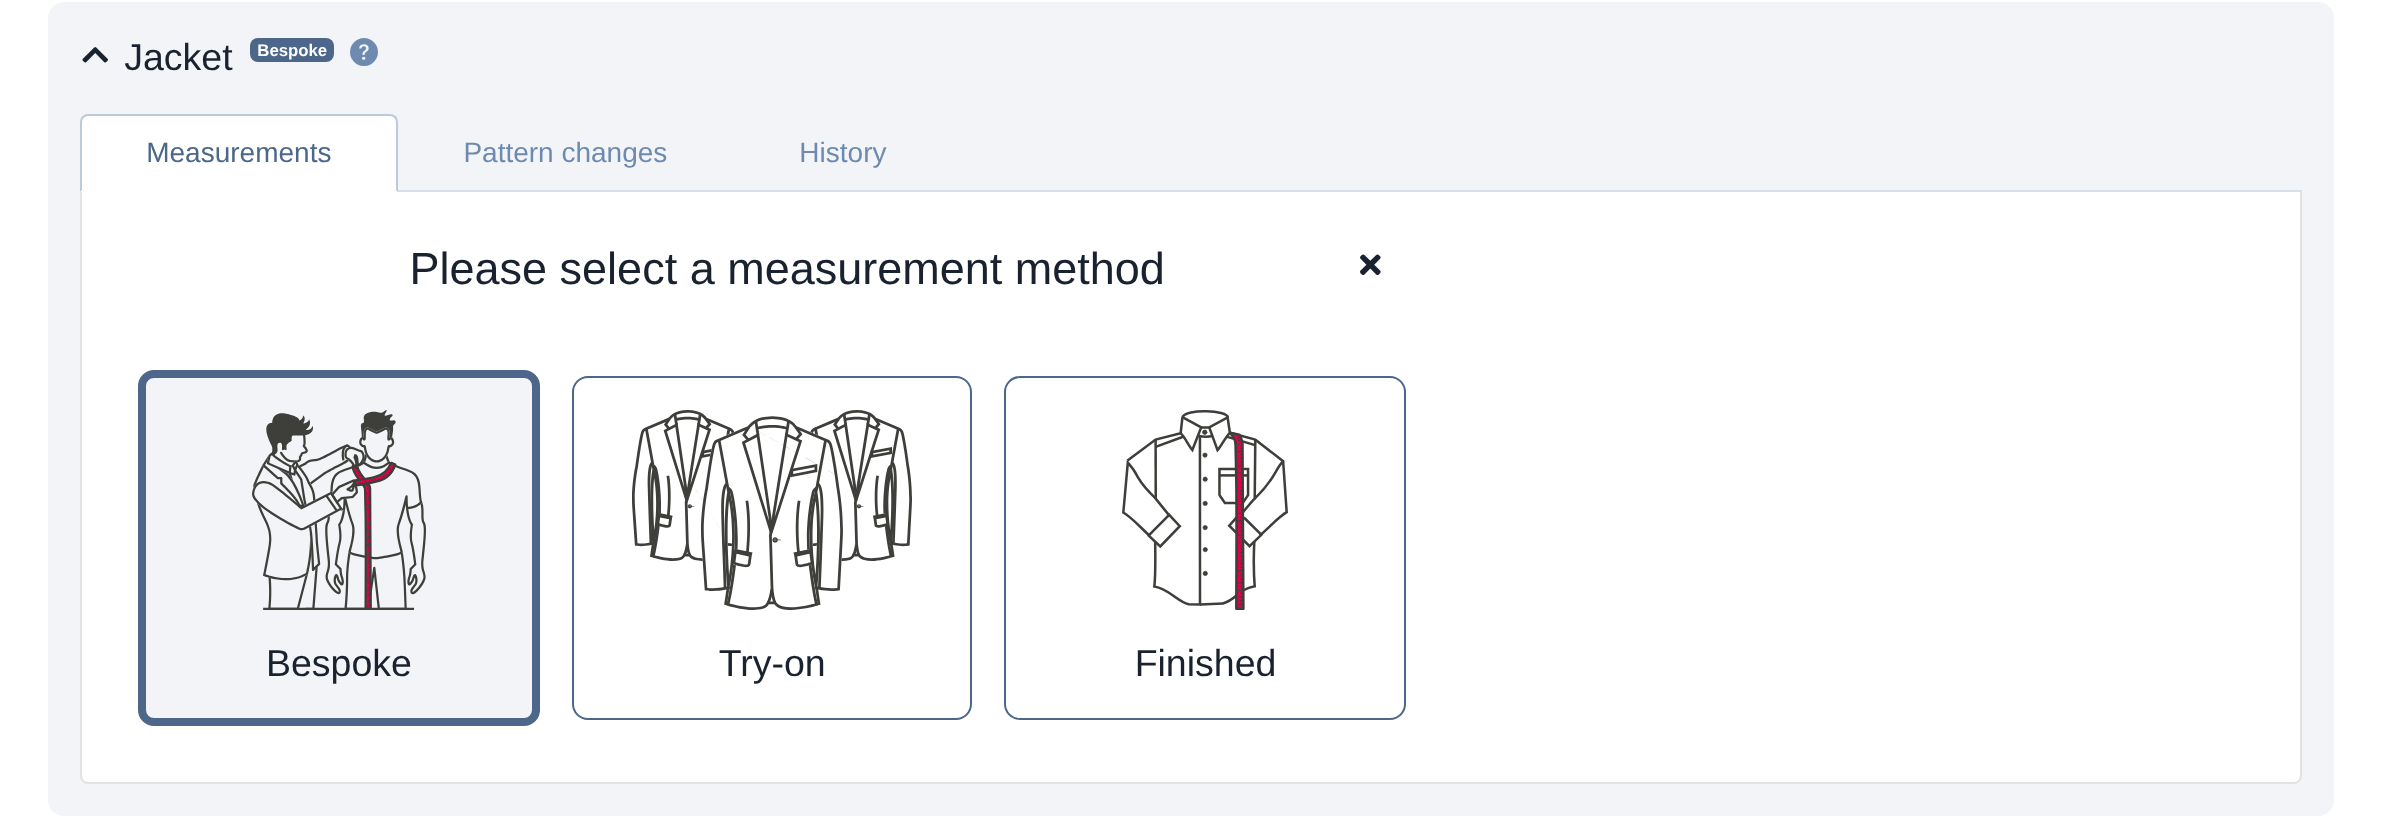
Bespoke is what you measure on the client's body. You pick a fit, the fit adds an allowance to each part, and body plus allowance is the finished measurement.
Try-on is what you measure on a try-on garment the client wore. You enter the garment's measurements, then the adjustment you want on each part.
Finished is the finished measurements themselves, typed straight in, with nothing added.
Not every garment offers all three. Change method, at the top of the garment, switches between them, and what you typed under the other method stays with it, so switching back and forth costs you nothing.
Bespoke, in practice
Pick the fit first, because it is what fills the Allowance column. Then enter what you measured on the client in the Body column. The Finished column is greyed out on purpose: it is calculated, and it is the number the maker builds to.
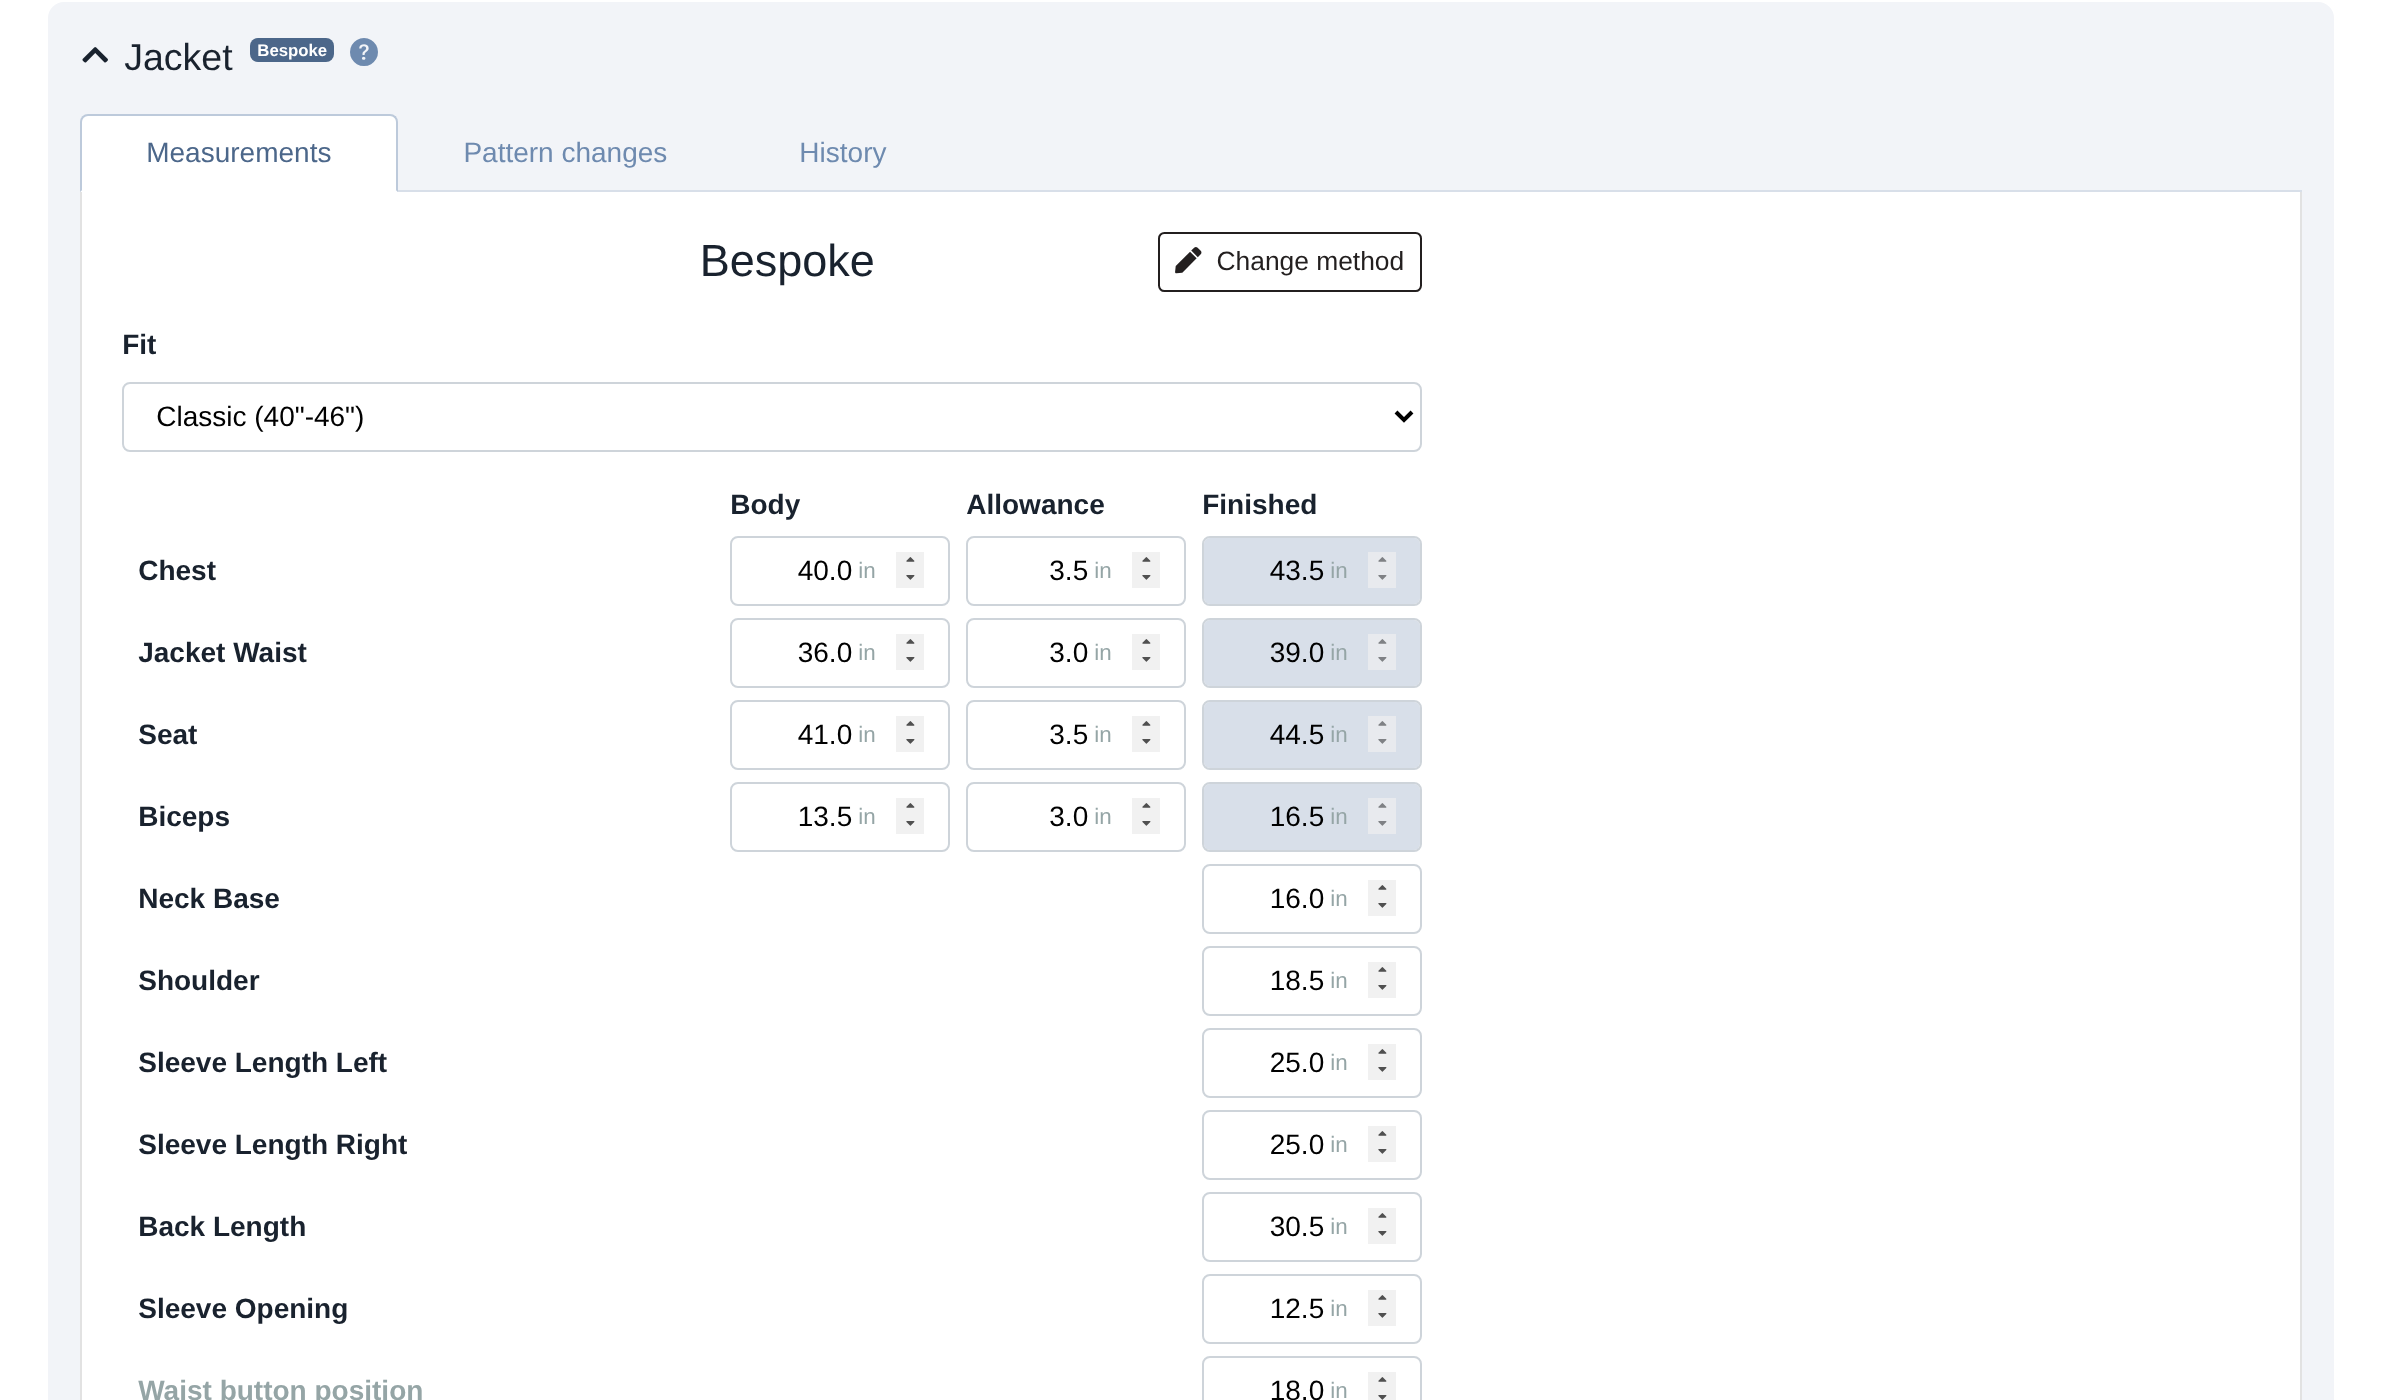
Parts that have no allowance, like a sleeve length, have a single field, and what you type there is the finished measurement.
Required and Out of range
Required under a field means the part is mandatory and still empty. An item whose measurements are incomplete cannot go into production: it carries a red triangle on its row in the cart until you fill them in. Height and weight count here too.
Out of range means the finished value falls outside what the maker accepts for that part. It does not block the order, it asks you to look again, because a number far outside the range is usually a typing mistake or a measurement taken in the other unit.
The garment at a glance
Collapse a garment and it shows its finished measurements as a strip, which is the quickest way to check a client before an order goes out.
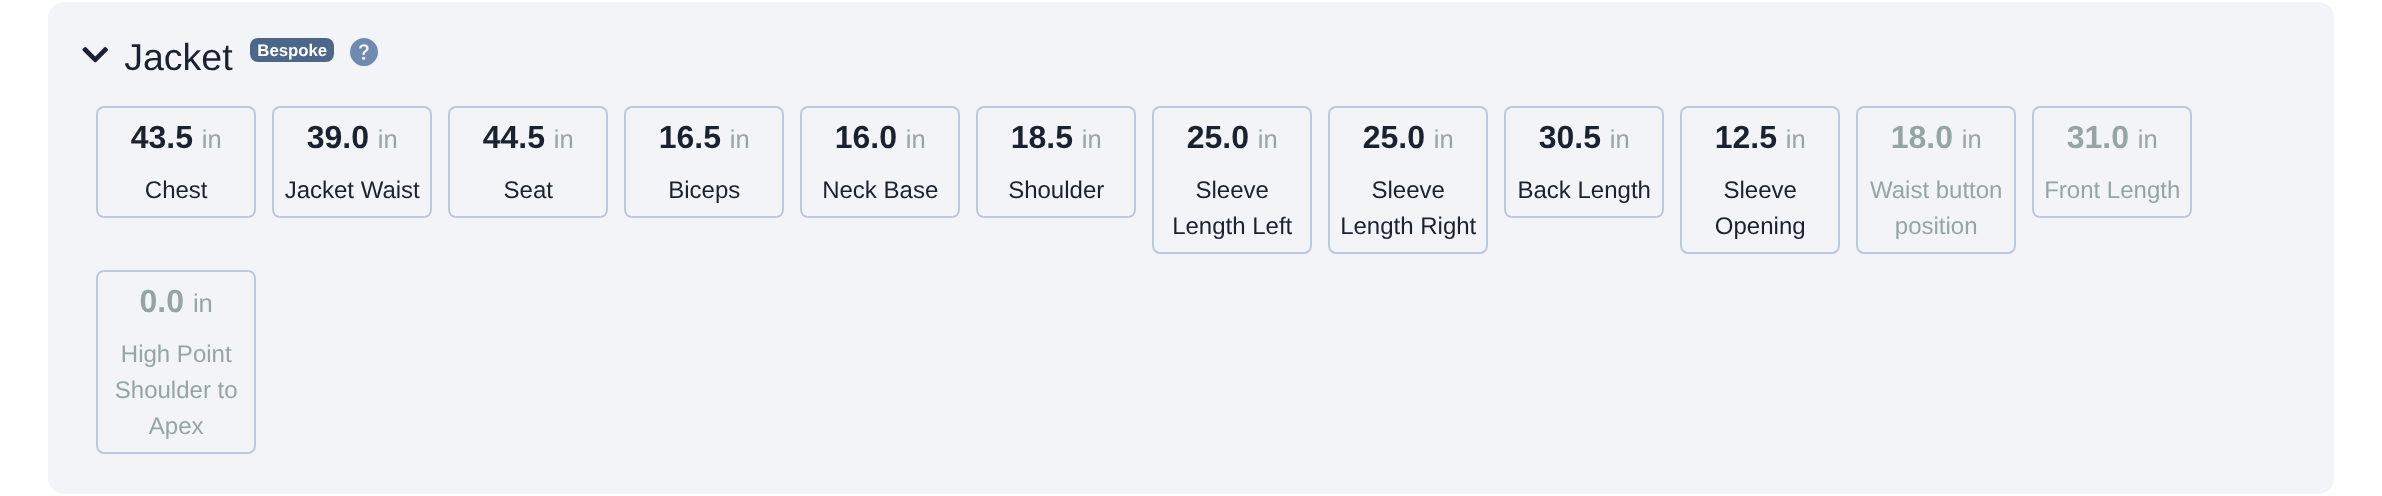
Two tabs sit next to Measurements on each garment. Pattern changes holds choices that change the pattern instead of a length. History shows every change made to this garment, the value before and after, who made it and when.
Units
The page follows the unit of the client, not yours. If that unit is not your brand's usual one, a blue notice at the top of the page says so, which is worth reading before you type a chest of 40 in centimeters.
Was this article helpful?
That’s Great!
Thank you for your feedback
Sorry! We couldn't be helpful
Thank you for your feedback
Feedback sent
We appreciate your effort and will try to fix the article